(→Stars) Tag: Visual edit |
Tag: Visual edit |
||
| Line 29: | Line 29: | ||
}} |
}} |
||
| − | '''{{PAGENAME}}''' is the twentieth and last level in [[Squeking Squid]]. To pass this level, you must score at least 1,000,000 points in 30 moves or fewer. |
+ | '''{{PAGENAME}}''' is the twentieth and last level in [[Squeking Squid|Squeaking Squid]]. To pass this level, you must score at least 1,000,000 points in 30 moves or fewer. |
==Difficulty== |
==Difficulty== |
||
| + | *This level is insanely difficult...until you figure out "the catch" (see Strategy below), after which it isn't that bad...and it may just become your favorite level in the game (see Walk-through below) due to endless replayability. |
||
| − | *The target score is very ridiculously high. There are a lot of [[Mystery_Egg|mystery eggs]] which can help you succeed, as they bring you +2 moves, give you 2,000 points, fill your [[Diamonds#Magic_Orb|magic orb]]. If you bring down way too many, you will be guaranteed to proceed to the next boards with all the extra moves the eggs gave you. [[Blocks#Diggy_Block|Diggy Blocks]] in their final form (where they give out 3,000 points per one, not all are giving 3,000; several give 1,000 in only one board). |
||
| − | *The only problems are that you must hit 1,000,000, the treasure rooms wouldn't be easy to get as much points that you really need despite being 2 coloured, and starting off with 30 moves (you get extra moves from the said mystery eggs). Not only are these are the problematic issue, but there are [[Blocks#Bee_Bomb|bee bombs]]. |
||
==Stars== |
==Stars== |
||
Revision as of 08:50, 27 January 2015
| Level | Past Versions |
|---|
Level 330
| |
|---|---|
| Episode | Squeking Squid |
| Level type | |
| Moves | 30 |
| Blocks | |
| Other features | None |
| Magic Orb | Unknown |
| Target score | 1,000,000 points |
| Difficulty | Considerably Hard |
| Depths | 4 |
| Boards | 7+ |


| Previous | Current | Next |
|---|---|---|
| Level 329 | Level 330 | Level 331 |
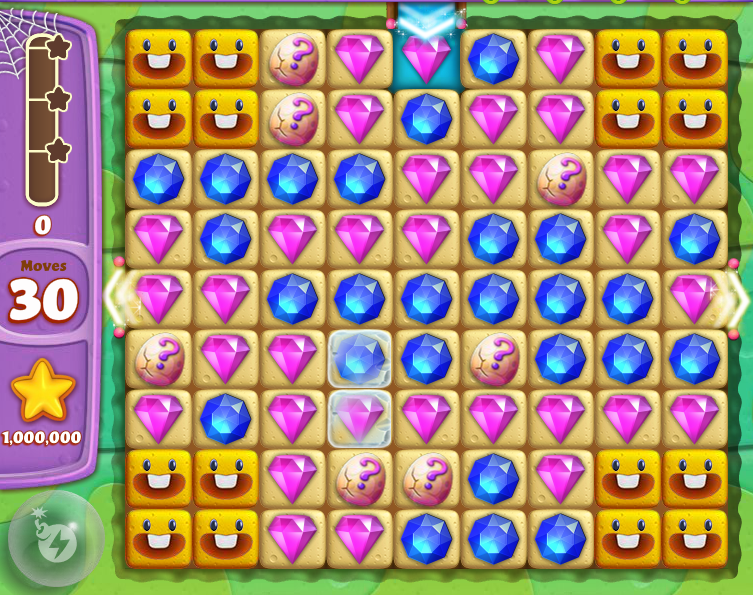
Level 330 is the twentieth and last level in Squeaking Squid. To pass this level, you must score at least 1,000,000 points in 30 moves or fewer.
Difficulty
- This level is insanely difficult...until you figure out "the catch" (see Strategy below), after which it isn't that bad...and it may just become your favorite level in the game (see Walk-through below) due to endless replayability.
Stars
  |
  |
  | |
| Points | 1,000,000 | 2,000,000 | 3,000,000 |
| Difficulty | Challenging | Impossible | Impossible |
Strategy
- Crucial: Don't go out room bottom exits if there is a side exit choice.
- Drop as many eggs as you can while delaying room departure.
- Hoard lives for the treasure room, where each is worth five gems (10,000) on average.
Trivia
- This is the level with the highest target score, breaking Level 290's score of 685,000.
Walkthrough
#330 is not only arguably the best level in the game, it’s the best level of any Match-3 type internet time-waster, and here’s why: it takes longer to play than the “refresh” time of the game counter, which means you can literally play Diamond Digger forever if you want to. With fifteen screens, it’s like playing four or five other levels in one, and most screens have the “entire grid” in play. Every room (except the treasure room) has eggs, and eggs are fun. Lastly, the treasure room has only two colors, so parlaying your leftover moves into a massive score is relatively easy.
As the biggest, longest and grandest level in the game, #330 is also the ideal point to stop trying to advance any further, as, while “pay to play” levels (i.e., boosters are almost mandatory to win) have been largely non-existent previously, they begin showing up with rapidity afterward.
Alternate goals to make #330 endlessly replayable:
- Try to achieve one million points before reaching the treasure room. - Try to achieve 1,100,000 points. Then try to achieve 1,200,000. - Try to acquire 100 remaining moves. Then 110. Then 120.
Walkthrough guide:
Preface: this is a four-level maze in which you need to travel horizontally through as many rooms as possible on each level. If, at any point in a room with both a horizontal exit and a bottom exit, you are forced out the bottom exit – you might as well start over, because the bottom exit bypasses a half-dozen rooms, almost guaranteeing that you’ll fail to reach a million.
First room: Go out the right exit. Doing so ensures that the multiple bee bomb rooms on the 3rd level are all approached from the best direction. (Note: going out the left side doesn't mean you can't win; it's just more difficult.)
Next room: This is one of two rooms (see 1X and 3 on the display) you’ll encounter in which there is an exit in the bottom as well as the side. YOU MUST AVOID GOING OUT THE BOTTOM. If you do, restart – because you’re not making a million. (Note that prior to #330, it has almost always been a good idea to get to lower levels quickly, so #330 throws the proverbial curve-ball by punishing reflexive gamer instinct.)
Don't expect much of a score from the first two rooms, as you're simply trying to get through the best exits. Hoard lives.
General strategy: most “side-scroll” rooms in #330 have a single exit on the opposite side which is five squares from the bottom. With two colors to work with, try to stall as long as possible in each room while dropping as many eggs as you can. As long as you can avoid having a vertical stack of five like-colors form on the far side, you can keep the exit from clearing and the action continuing in that room. Many rooms on the third tier have the same configuration of bomb bees in all four corners; they always explode in the same order, with the bee in the lower-right always first. If you “went right” (as recommended above), you will enter these rooms from the right side, making it FAR easier to douse the lower-right bee with water before he goes off.
Rooms 1Y and 2 (see display) have potentially a lot of points, but limited ability to drop eggs. In the treasure room, each move will yield 10,000 on average, so don’t waste lives chasing small scores earlier.
Tip: if the far wall of a bee room has an egg in the column, try to get it on the exit before the bees explode. Bees can’t blow up eggs, so eggs squares are protected.
Tip: One of the bee rooms has three rather than two colors. As the potential for avoiding a force exit (and thus racking up a mass quantity of eggs) is the best in the room, you’ll want to douse the bees as fast as possible.
Tip: You’ll never get more than one star because the scoring algorithm is bugged.
Tip: A life is not worth trading to "rescue" one egg - unless the rescue also clears a mass of gems (possibly bringing down more eggs).